Veliki Oltar to Visoki Rokav
Veliki Oltar - Visoki Rokav ridge crossing
Trip overview
Veliki Oltar and Visoki Rokav lie within 400 meters of each other and that is the length of the ridge that is connecting them. Nevertheless, a time of approximately 2 hours is needed to cross the ridge - and that can be considered a really good time for a team that stays on the route and is efficient with rope technique. The ridge is equipped in key places with pitons and loops.
Although the overall climbing difficulties do not exceed III grade (and spots with these are not that numerous) I would strongly recommend to use rope for the whole ridge. The exposure is constant and the rock quality is not always the best which makes a potentially deadly combo. For the solo climbers the rope would also be mandatory, downclimbing some sections without at least a fixed rope could be called as lack of respect for human life. Besides, the rope will be necessary for rappelling down from Visoki Rokav.
Route description
Veliki Oltar via Grlo - route description (II):
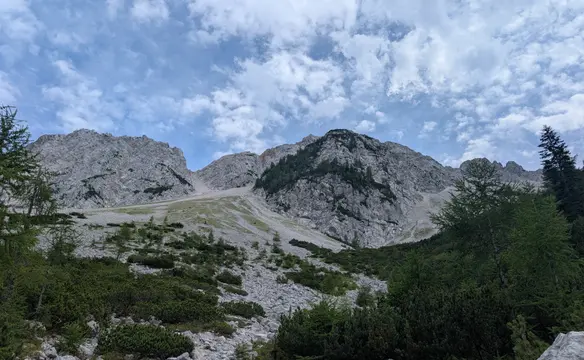
We set off from Bivak II na Jezerih bivouac in a northern direction, following a path that leads to Grlo pass and other peaks in the neighborhood (Dovški Križ, Šplevta). The path is well-trodden and easy to navigate. Already from the bivouac, we can see the ridge of Veliki Oltar and Visoki Rokav; the Grlo pass is also visible, which helps us keep the right direction. On approaching it, we see that we need to enter a wide chute that leads to the pass. However, we don't stay in the chute while climbing it; it runs left and leads to a grassy opening and shelves which eventually take us to the ridge above Grlo pass. The climb is not very demanding and only occasionally reaches II degree of difficulty. There are cairns that help a lot. The rock quality could be better but in the end it does not make that much of a difference. Next, we have a bit of walking terrain in the direction of Veliki Oltar. Only in some spots is surefootedness required; the rest is easy walking. From the path we can already see the slope of Veliki Oltar which we will be climbing. It is located on the left side of the big gully running from below its top. The climb itself is not very beautiful because we are on narrow ledges covered in tiny rocks. This section again is not difficult, but it requires more focus as we are gaining altitude and slipping off here could result in a major fall. In the upper parts we reach the ridge again, climb one more difficult spot (II, loops on the crag), and we are on the top of Veliki Oltar.
Veliki Oltar - Visoki Rokav ridge (III):
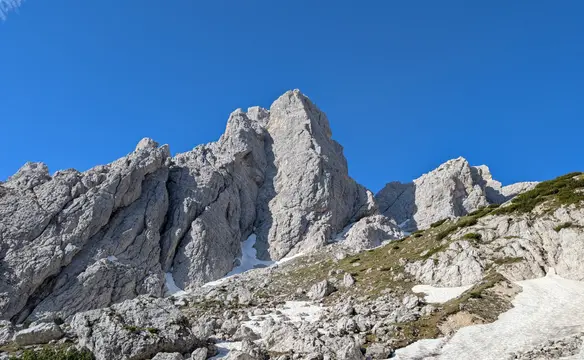
From the peak of Veliki Oltar, we start in easy terrain in the direction of Visoki Rokav directly on the ridge. We by-pass two towers and begin to descend to the point where the ridge gets vertical - there is a piton and a loop here. This is where we leave it on the right side (north, Velika Dnina side) down an indistinct chimney (III, another piton inside). We land on a narrow ledge and continue to the small col back on the ridge again. The next culmination can be climbed directly or by-passed from the left side (south, Vrata valley side). A bit crumbly here. On the next col we are looking at some weird, head-like towers that do not look welcoming. This is where we go down right again, for a bit longer traverse. There are maybe two cairns on the way; we should keep as close to the ridge as possible and not descend much during this traverse. At some point we will reach a vertical looking wall. It's not that vertical in the end and offers a lot of holds; there are loops and pitons here. We climb the wall (III) and enter a narrow chimney which gets less steep as we continue and we reach yet another col. This is where we return to the ridge, this time for good. It also means we are entering the most exciting part of the climb where the ridge gets super exposed. Most of the towers we climb directly, with maybe a maximum 1m by-pass where necessary. Once small towers are climbed we have two bigger ones to handle. The first one has a piton with a loop on the top (III). However, the downclimb is the worse part here; the rock is crumbly and the spot is exposed. Protection options are rather limited. The second big tower (and last one before the peak) is more vertical but offers nice holds and that 10m climb is really pleasant. Once on the second big tower we are practically at the summit of Visoki Rokav.
Links:First III downclimbRidge by-passWhere the fun beginsKey plate (III)
Visoki Rokav - descent via Rokavski Ozebnik (III):
A lot can be said about the descent from Visoki Rokav except that it is pleasant and safe. There is no marked path to the summit, however the route seems a bit more frequented than the ridge connecting with Veliki Oltar. We follow the manageable path in a southern direction until we get to the first abseiling anchor. Most of these are made up of two pitons and a loop; there are also occasional bolts on the way. Rappelling length is usually about 30 meters, and a 2x30m twin rope is enough. Before abseiling, make sure there is no one below. It is virtually impossible not to trigger loose rock material. It's also very tricky to wait for your partner below and not get hit. The first person to abseil should make sure to remove all the rocks that can be triggered later on (by the partner or simply by the rope itself). Anchors are located in places to minimize such outcomes, though not fully. There will be 4 rappels in total before we touch the ground in Rokavski Ozebnik - a large gully running along the southern face of the mountain. Depending on snow conditions, we may want to land at the top of Rokavska škrbina col if there is plenty of snow to cover the rubble inside the gully. If there is no snow, we continue rappelling down on the right side of Ozebnik gully - at least twice. I was not able to verify it further down because we descended in winter gear without the need for a rope. Pay attention in the gully as there can be spontaneous rockfall coming from the col, not to mention the situation with more people climbing/downclimbing Visoki Rokav.
At the mouth of Rokavski Ozebnik gully the difficulties are over. Now we hike down the scree field (super fast!) and enter a distinct path back to the bivouac. From the Bivak II na Jezerih bivouac we take the same route as we approached it the day before. Now we can keep more on the scree to make the descent faster.
Links:Rappelling from Visoki RokavTerrain in Rokavski ozebnik